table lamp diagram via
Materials:
Lamp
New cord (here's a basic clear replacement cord)
Screwdriver
Wrench
Glue (gun or tube, whatever you have on hand)
1. Lol...unplug lamp. Remove felt/cardboard bottom.
2. You should see the cord going up into the lamp base through a metal tube that's secured with a nut (and washer). Don't loosen this yet.
3. Unscrew the socket above the harp bottom. You don't have to be gentle. You'll feel the cord twisting inside, but it will eventually come loose. You see that the socket on my lamp is black plastic- most sockets are brass like the second picture. They unscrew all the same.
4. Loosen the bolt on the bottom (shown in the step 2 picture). Your lamp will literally almost fall apart. Don't worry. The thing that holds it all together is that long metal tube. Once you get it rewired and tighten the nuts, it will be better than new!
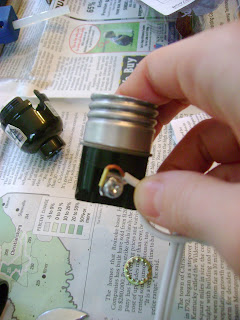
5. Unscrew the socket cap. If you have a brass socket (as shown in step 3 pictures), simply jiggle, twist or pry it off with a screwdriver. Sometimes they are a bit stubborn but just keep trying. Then pull on the socket to reveal the cord knot.
6. At this point, I had to cut the wires going up into the socket, but that's because mine is abnormal. Most likely, your wires will be secured to the socket with small screws. Simply loosen the screws and detatch the wires from the socket.
7. Loosen the knot at the top of the cord and pull it out through the bottom of the lamp base. Pay attention to the placement of all the washers and nuts so that you can thread the new cord exactly the same way.
8. Next, thread the new cord through the lamp base taking care to replace all washers and nuts. Thread it out through the top and then tighten the nut on the bottom of the lamp base. You might not want to tighten it all the way until you have adjusted your lamp parts so they all line up right. This will make sense once you get to this point.
9. Replace the socket base. Again, mine is black plastic, but yours is likely brass. Screw it all the way down, tight.
10. Pull apart the two wires like this. Then create a knot as shown. A picture of this knot will also be on the instructions that come with your cord.
11. Look closely at the two wires. One will have ridges along the outside and the other won't. Secure the ridged wire around the silver screw then tighten.
12. Secure the smooth wire around the gold screw and tighten.
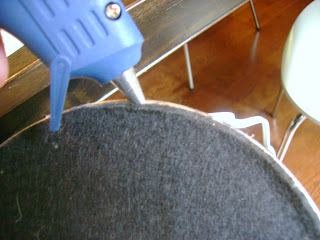
14. Replace the felt/cardboard bottom and secure with some glue. Just make sure it's dry before you set it down on a surface... unless you want your lamp permanently affixed to your tabletop. That Crazy Glue is something else.
15. Replace your shade and you're done! I don't really have a good before picture for these lamps, but originally they were black with black cords. I painted them white a few years ago and the existing black cords always bugged me. Here's a post showing how they have evolved.
And another view that's pretty easy to hide from you...

Could there be any more finishes here? Seriously, I think they should outlaw all polished brass. Anyone else have lamps that look like this? :)
Hopefully this tutorial will be of some value to you. If you ever purchase a lamp at a junk or consignment shop, I would highly recommend replacing the cord and maybe even the socket before using it. Who wants a $5 lamp to cause their house to go up in flames? Not me.


This is great! Thanks for the tutorial. I have a couple of flea market lamps that need rewiring.
ReplyDeleteThanks for taking the time to do this post Katie. Bookmarked!
ReplyDeleteThis is actually pretty easy! If I sound shocked, it's because I AM...if you had asked me 10 minutes ago if I could re-wire a lamp I would've stared at you blankly and then laughed...now I think I could actually *DO* it! (c: Thanks for the tutorial!
ReplyDeleteDude great tutorial. I would never have guessed how relatively simply this is!
ReplyDeletexo